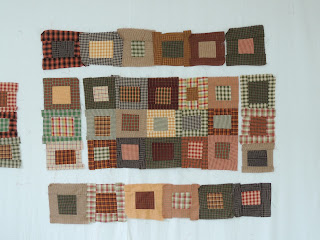
So one way to make everything fit would be to trim all the blocks to the smallest block. But that would kind of defeat the purpose, since there is a large size difference, leading to a lot of wastage!
Another way might be to arrange the blocks by just matching widths and make a bar quilt, as above.
But I want to make this a more random arrangement I'm going to start by matching the blocks by 2's.
Then take 3 of the pairs and add a third. That will make the center of the block arrangement.
When piecing these slightly off blocks it's important to line them up, ignoring the tag ends and long bits. The line of the seam needs to be perpendicular to the top edge.
Now it's time to straighten up the edges a bit before sewing the long seams.
Once the center is together then build 2 more rows of 3 on either end.
Once those rows are sewn on the final set around the border can be arranged.
Notice the smaller blocks tend to be in the center and the larger blocks are on the outside. While the inside rows are 7 units long the last 2 outside rows are only 6 units. Another way to randomize the overall distribution of the different size blocks.
Speaking of trimmings that's all that I had to trim off. Granted I did not trim a lot of the tag ends in the seams because this fabric proved to be very 'thready'. I figured trimming would only aggravate that situation.
Since the homespun is kind of course I think I will use a nice soft flannel plaid. Here's what I have in my stash. I'm kinda leaning toward the one on the right. After the busy center the simple one makes more sense to me. What do you think?!
I think in olden times quilts were constructed like this a lot. Utility quilts could be wonky, why not? As long as they use every percious scrap to make them. cheers, Claire W.


What a fun quilt, Claire. Thanks for explaining how you arranged and sewed it. Will you keep it or give it away?
ReplyDeleteLooks very pioneer. Like it came out of a connestoga wagon. It was interesting following your design thought process and how you get to such an intriguing finish.
ReplyDeletean unbleached linen for the border - but yeah that's not in the stash so I would pick the right one. [Or do you happen to have something more neutral? or with a bit of red in it?]
ReplyDeleteOhh I just love sewing without trimming - I'm just no fan of trimming (and I have 64 flying geese wanting to be trimmed).
Well I like wonky even though I always end up orderly .. somehow
I love it Claire! I'm a fan of homespuns and I love the way you assembled this quilt. Either border would look good, but I like blue better then green, so I'd choose that one.
ReplyDeleteI'm with Leo, a more neutral border would let the blocks be the focal point and I like the idea of a little red in it. I think the blue border is too dark so I'd go with the green if I had to choose between the two. I know that using from your stash is a good way to go! I like your quilt very much and loved the pics along with your thought processes! Nice post.
ReplyDeleteI like the plaid on the left best. A narrow border of the blue and wide border of the green would be awesome, too. Thanks for sharing the process and the reminder that homespuns tend to be 'thready' LOL
ReplyDeleteHow about using a narrow border of the blue with a wider border of the green? Thanks for sharing your process.
ReplyDeleteI love this quilt! It looks so snuggly and homely. Exactly what a quilt should be!
ReplyDelete