It's Still Blog Give-away Time! Yeah!
I am participating in the Quilt Gallery-Blog Hop Party w/ Give-Away. (link to the right) But what to give-away? I’ve been collecting fabric seriously for more than 20 years. So here’s my give away. TEN - Fat Quarter’s (that’s a $25-$30.00 value) selected from my stash tailored to the request of the winner! I’ve pretty much got it all; batiks, repro’s from the 1930’s and 1800’s, all colors, kids fabrics, bugs, food, flowers, oriental, flannels, plaids, etc... The winner can request a smorgasborg or all of one kind. Fun for you to make a wish list, fun for me to tailor a collection just for you.
What do you need to do? Leave me a comment at the end of this blog ( please, just one comment per visitor) and a way I can contact you if you are the lucky winner. I will even cover over seas shipping! I will draw a name at the end of the blog- hop at midnight, Pacific time and announce the winner by Weds. Sept. 5th.
And Now for Scrap Strategy #2- start sewing
Just to re-cap: Check out my blog from 8-3-12. Scrap Strategy #1 is to sort your scraps. You don't have to. You could just put all colors and styles of fabric in one basket but I think sorting according to fabric style is particularly useful and makes design sense. My tastes in fabric run all over the map if I were to mix all my scraps together I think I would end up with an incoherent hodge podge. Perhaps your scraps have more focus and you can skip that step.
Any who, the next thing is to seperate your chosen scraps into two piles, strips and other. for me the 'other' is predominately square and rectangular patches with a few triangles mixed in. I don't bother to true anything up I just take 'um as they come. Put your strips on one side of your sewing machine and your patches on the other. Pick out a strip that makes you smile and put it under you presser foot face up then take a patch from your patch side and lay it right side down on the end of the strip. Sew your standard 1/4" seam. Pick up the next appealing patch and lay it a short ways after the first patch. keep going until you run out of that strip. Repeat this several times 'til you have a pile of chained components.
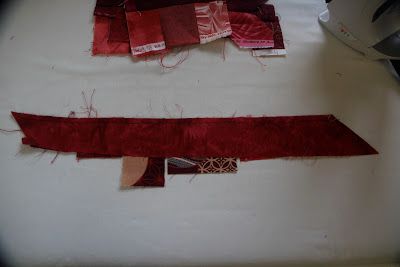
One unit Looks kinda like this, ready for the iron.
It's easy to iron toward the strip, you just flip the strip up and run your iron down the seam and since we're not really too worried about accuracy here just snip between the patches with scissors, saves a lot of time!
These are from a red scrap project, here's what it looks like with kid fabric:
From here you can flip them around and sew them to each other...this
To this...instant checkerboard, well sort of.
Or like any of these combos.
You can take these units and sew them to each other or more strips etc. Until you have a nice collection of scrappy units to play with like this:
Sometimes you find two strips that go well together, so go with it...
Then you need to decide how big you want you blocks to be and start combining units that give you approximately that size.
Close to the center you can see part of the finished block below (rotated 180).
Here's another finished block. Can you find the subunits in the picture above?
Here's the finished quilt.
I think framing each block with its own frame helps calm every thing down. I think that works well with sampler quilts to.
I use this basic technique with all styles of fabric. Grandma's quilt in the last blog started this way. You can see there are a lot of leftovers but that's OK 'cause it's all kind of an ongoing process. Some of those units will go into the next kid quilt I make.
A note about this technique; I got the seeds for the idea for this strategy from an article in the back of an old Quilter's Newsletter mag. It was probably 10 or 12 years ago. I would give you the exact reference but I can't find it. If you stumble across it please let me know.
I hope you are all having fun with the blog hop. I sure am! Special thanks to all who have signed onto follow my blog. I am very grateful and energized by your kindness and interest! Cheers, Claire W.


