Tuesday, December 8, 2015

Riffing on the Tree blocks and Holiday give away!!

THE Holiday Give Away is featured at the bottom of the post!
riff |rif|= noun

(in popular music and jazz) a short repeated phrase, frequently played over changing chords or harmonies or used as a background to a solo improvisation: a brilliant guitar riff.• a monologue or spoken improvisation, esp. a humorous one, on a particular subject: subsequent riffs onthe same themes were hysterical!The inspiration for this post came from these two posts over at Cath Hall's blogspot, Wombat Quilts.  Check out the pix of the tree quilts she posted:http://wombatquilts.com/2015/07/31/just-one-tree-in-the-forest/http://wombatquilts.com/2014/06/19/a-wonky-tree-forest-and-tutuorial/My small quilt group decided to make a quilt for our Guild Auction using the pix on Wombat Quilts as inspiration.  Each of us were going to make 7 blocks and then we'll combine them to make a lap quilt.  I started making tree blocks and it turned out to be sooo much fun I just kept on going!I started by getting out my GREEN scrap basket and one thing just lead to another... Most of the construction is pretty self explainitory but here are two techniques you might find helpful! Here's an easy way to frame a cone shaped tree. 
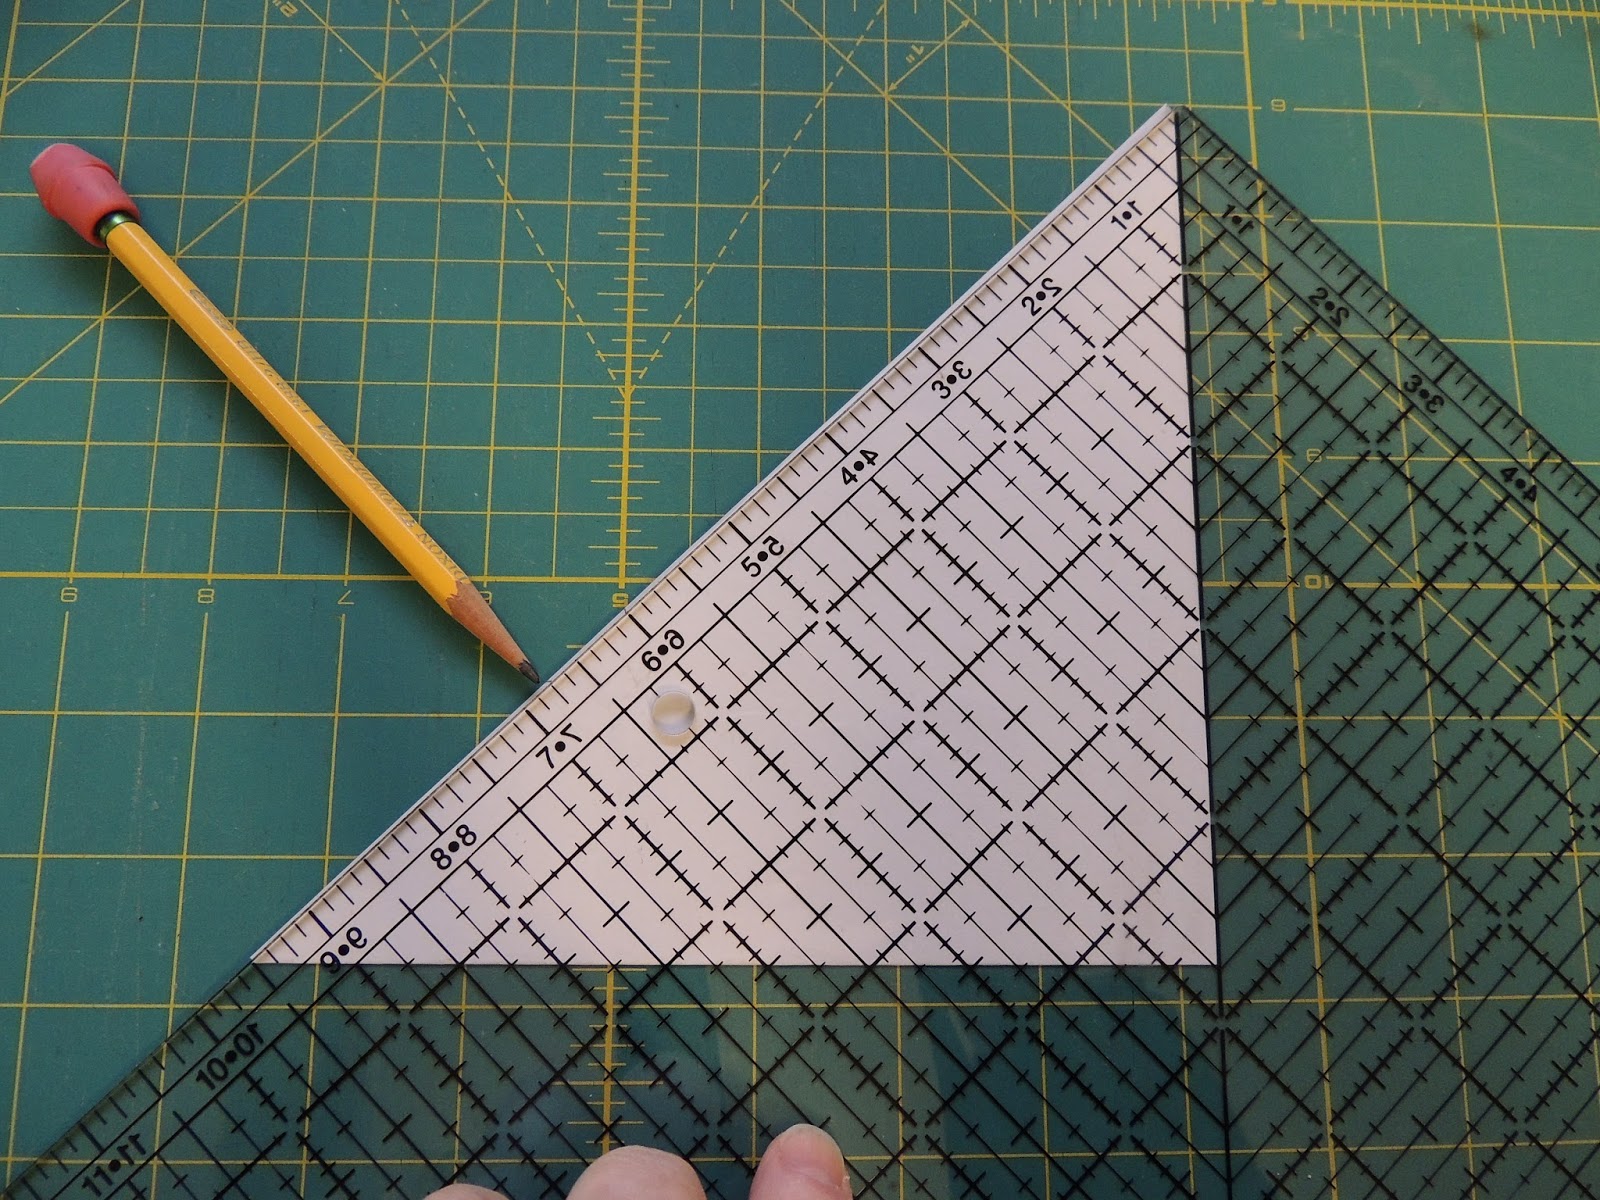
Measure the base and height of the cone.Cut a rectangle that is at least 1 inch wider and taller. Position your tree on the rectangle as you like. Cut one side. Pull the tree about 3/8 th inch off the left side of the back groundand cut along the left edge. 

sew left side and then right side. add a trunk and square it up! 
Curvey trees
The trick about curve piecing is to place all your patches face up.then  cut nice gentle curves free hand.                                 more curvesIn this block the trees were so narrow I drew in the trunks.  I will go back and use an embroidery                                                 stitch to cover up the ink. Or not, lol!                                        I had a bunch of HSTs left over from some project so I used those to make some more conventional blocks.      
                                
Some patches seem just perfect the way they are just put a trunk on them and frame them and you are good to go!

A tree without a trunk?  Why not!?
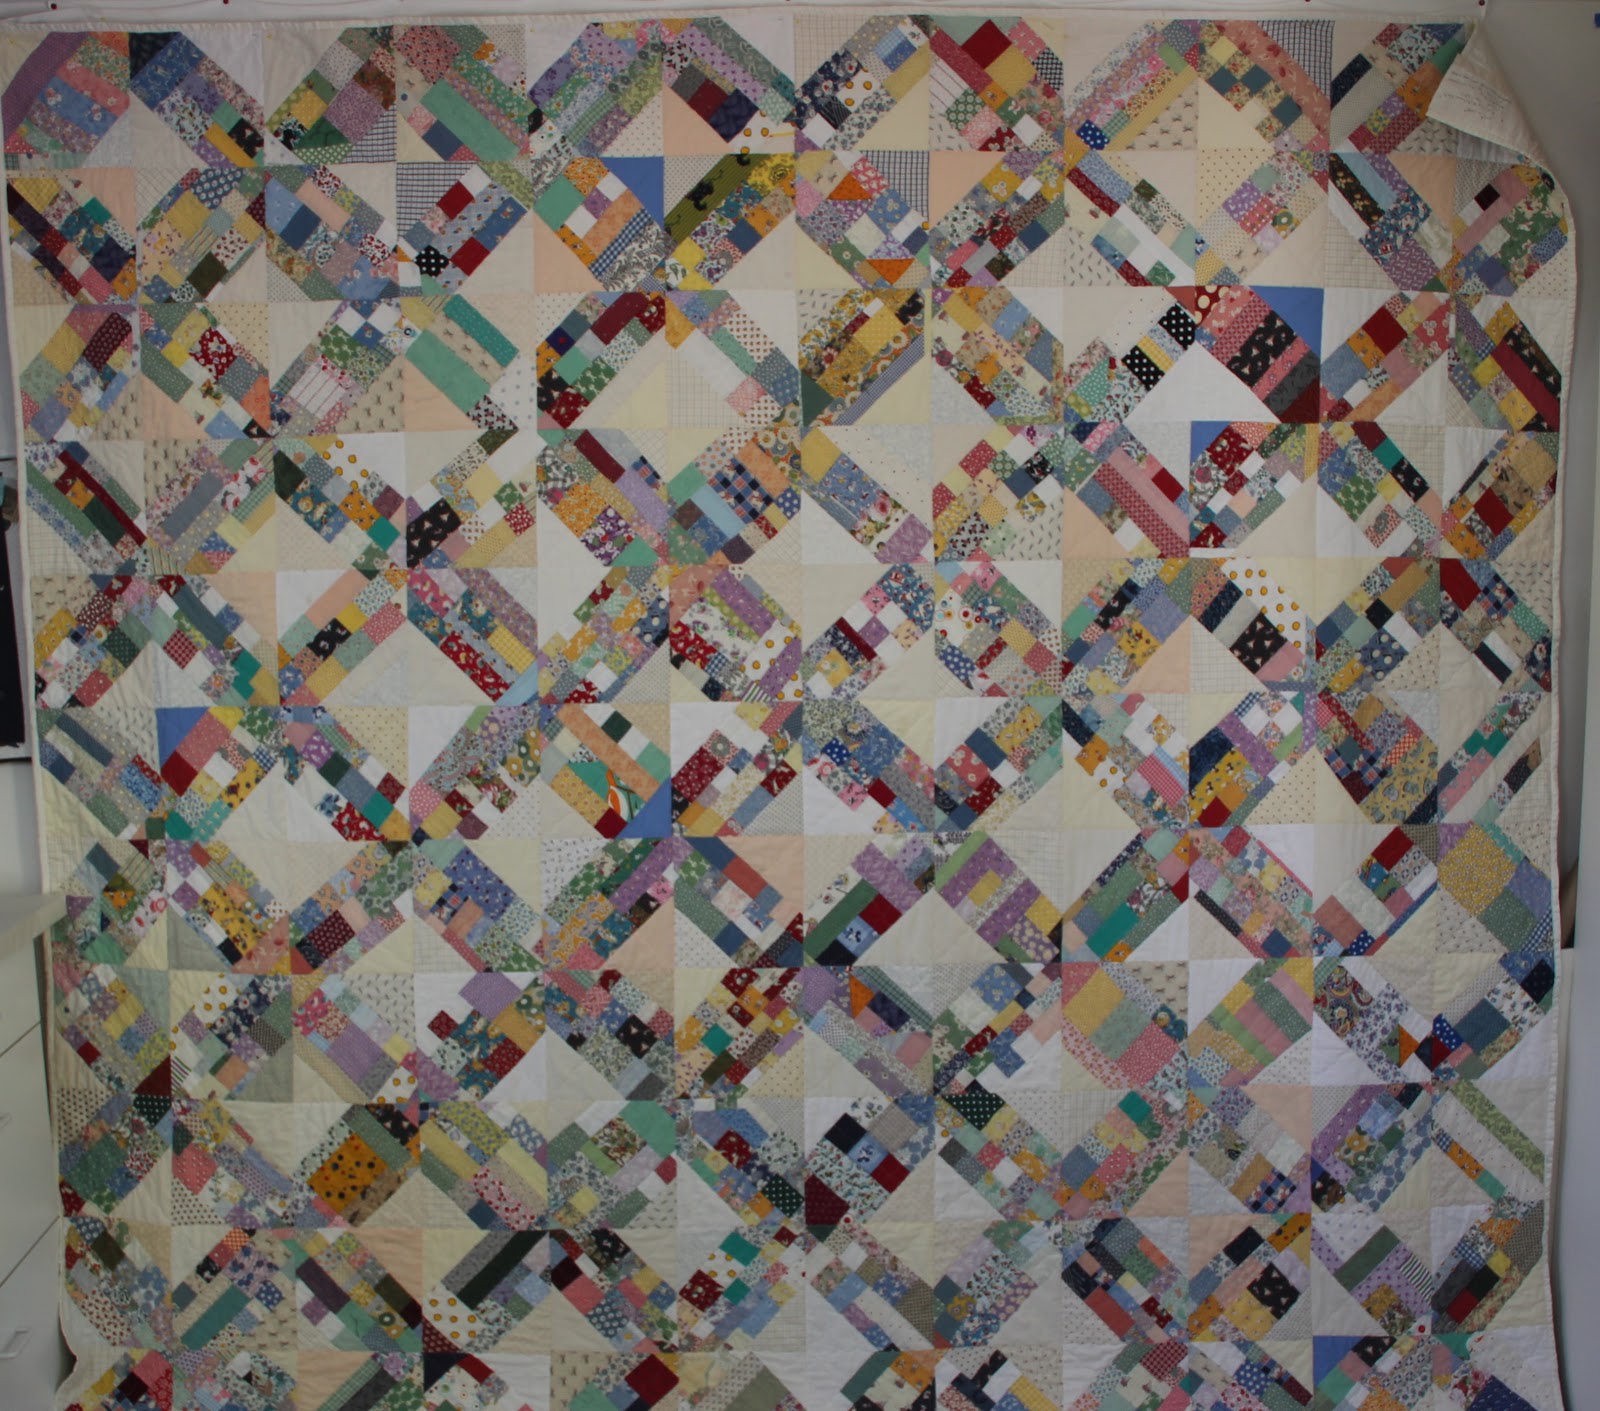
And here they are all together...(the flying geese aren't sewn just placed on the flannel.) The spaceing and sashing needs work but it's a start!  

And it was so much fun!!!!

And Now For The Give Away! 
The first prize is 8 Fat Quarters of Batiks in Holiday colors!

The second prize is 1.5 yards of this really cute Holiday fabric!
All you need to do to is leave a comment on your favorite tree block and if you sign up to follow my blog by any one of the modes; listed in my side bar I will enter your name a second time!
I'll pick 2 random winner's next Tues.
Have a wonderful week!
Cheers, Claire W.


Thursday, December 3, 2015

Birthday Gifts

If you are looking for the Nov. BOM  check the Tab at the top for the link!

My grand daughter is turning two on Dec. 6th!!
She is such a Joy!
 She loves to sort things, put them away and tiddy-up!  My kids were always the opposite,  Maximum Mess! LOL!  Anyway,  I Thought she'd enjoy theses wooden shapes on pegs.  A great sorting game and lots of options for putting things away!
One of my master teachers use to say ' pick toys that you would like to play with, you're sure to play  with your kids more often'.
I love colors and shapes too!
I thought a little bag to keep them together might help!
And save on wraping paper!
Another recent birthday;  my next younger Brother-in-law just turned 60!  I figured that deserved a quilt?!  And fortunately I had one on hand that I thought might suit him.
"Purple, Green and Blue Scraps"  about 60" x 60"
I made this as a class sample for my Scrap Strategies class awhile back,  but I have lots of samples for that class so I figured I could spare this one.
There are purple, green and blue scraps that date way back and lots of fun shapes from leftovers that add interest to the piece work. 
I quilted this quilt in an allover squiggly version of Hanging Diamonds. 
                                     
                    And backed it with a wonderful dark blue flannel, soooo cuddly and warm!
                                  Next post (BOM Monday) will be my Holiday Giveaway too!
                                                              Happy December!
                                                               Cheers, Claire W.


Tuesday, November 24, 2015

PVQA Block of the Month - Modern Kaleioscope!

PVQA.org November 2015 BOM- Modern Kaleidoscope                                      11.5”  Unfinished

Sorry it has taken so long to get these instructions posted but since the block is not due until our Jan. general meeting you will have plenty of time to complete it!
At first glance you might think this block is going to be tricky?!  Besides the bias edges there's really nothing tricky, all the seams are straight and if you let the feeddogs do their job, the bias edges should be OK! (view is 4 blocks together)
The inspiration for this quilt was a picture of a quilt by Katie Blakesley on the Home page of ModernQuiltGuild.com.  Checkout their website;  MQG is a worldwide Online guild that puts on QuiltCon and provides a whole lot of great info. about the Modern quilt movement!

Fabric: 
Choose the Background fabric (B= the equilateral triangles) from a variety of solids:  light grey, white and off -white (like muslin) and if your packet includes a piece of light green fabric use that for one of the triangles.
Choose one print for the star fabric (A = the four sided star shapes).  Colors can be bright, dark or medium dark; purple, green or blue or a combination of those colors.  Prints can be almost any style as long as they conform with the colors suggested.

Cutting:
Cut out the 2 templates (A & B) on the their black out-lines.  The seam allowances are included in the out line.  Match the arrows on the templates to the straight of the grain on the fabric.
Place a straight edge over the edge of the template and using your rotary cutter to cut 8 copies of the Triangle B and 4 copies of A .  Use a few dabs of glue stick to hold the templates to the fabric while you are cutting (if you need it).

For people online who are probably saying "Where's the template?!".  You can make your own by cutting a 9.5" square of paper.  Cut that in half diagonally, 

fold one of the resulting triangle in half, measure 6 3/4" from the non folded corner on the long edge and cut from that point back to the 90 degree angle.

Unfold  A and trim 1/4 inch off each side 
 check your seam allowance by checking the overlap in A and B 
Sewing:
Match one of the long sides of A to the short side of B, press and sew.  
Be sure you get the proper over lap on the ends of the seam and sew the seam with The B triangle up because that is the non-bias side. Trim the ‘dog ears’ and press the seam toward A.  
Sew a second Triangle B to the other long side of A.  Again with the B non-bias side up, trim and press toward A. Repeat with the other 3 sets of – A patches and B triangles.
Match two of the above units on the short side, press, pin at the seams and sew from the A end to the B end of the units. There will be a bit of a bump to sew over at the seams (pin) but gosew slowly and your presser foot should ride over the bump.  Repeat with the other two units.  

With the long edge of these units away from you. Press both seams to the left.   Match the two halves in the middle.  The seams should “Nest”.  
Press and pin at all seam intersections and at either end.  Don’t worry if the outer edges aren’t exactly the same length.  The triangles were draw a hair larger so they could be trimmed down after sewing. Trim to 11.5” = unfinished.  
Here are the four blocks together again nicely trimmed to 11.5".  I think the way the background goes together really adds a lot of interest to this design!?!  Now all the outside edges of each block are biased edges.  If you are worried about pulling them out of square when you sew them together give them a light spray with Spray Starch and that will help stabalize the edges as you sew!
I hope you all have a wonderful Holiday full of lots of family, friends and laughter!
Cheers, Claire W.

?? email cspoonquilt@yahoo.com or check our my blog www.cspoonquilt.blogspot.com

Friday, November 20, 2015

Invention of the Sewing Machine

It's surprizing how many problems can be solved when Sleeping!
Have a great weekend !
Cheers! Claire W.

Monday, November 16, 2015

Whims and Fancies Trunk Show

Thanks to Soma at Whims and Fancies for the chance to take a stroll down Quilt Finishes Memory Lane!

If your looking for the PVQA November BOM I will post it next Monday.

I went to my first Quilt Guild  "Show and Tell" in 1994 and I was immediately smitten with the World of Quilt Making!

 I like all Kinds of quilts and so I Make all kinds of quilts. How I decide what kind of quilt to make usually depends on who I'm making it for.   For gifts for friends and family I try to figure out what that person would like.  If it's a Charitable quilt it might be quite simple for time sake.  If it's for my own entertainment or a personal challenge I tend to make quilts that are Scrappy and / or abstract.  My website  is titled "Confessions of an Eclectic quilter", see what you think!?

Early Personal Challenges....
Blue and Gold- 1998
This was a very formative quilt for me.  The challenge was three fold: 1- I rec'd the blocks through a block swap so they were not all the same size.  2- It was one of the first quilts I quilted on my new Longarm (Very Scarry!) 3- How to work with a Scrappy look without it becoming a total mish-mash!
Work Smarter Not Harder- 2000
My Friends tease me about how many UFO's I have. 
 Every class produces another UFO!  So I started taking the same basket of fabric to every class.  This quilt represents about 5 classes worth of techniques.
Geisha Surrounded- 1999
I won these Bourgoyne Surrounded blocks (in amish colors) through my guilds BOM.  The problem was there was a huge difference in size between smallest and largest.  Rather than set them in the traditional setting I used them as a border where the difference in size would not be so noticeable.  I designed the center to compliment the border.
Dream Fabric- 1999
About half the blocks in this quilt were from a block swap.  I just love that hokey '50's fabric in between the blocks and this seemed the perfect use for it!
Long Standing Lone Star- started 1998 finished 2014!
This was a real exercise in patience 'cause the piecing was soooo tedious, thus the long time to the finish. 
Moterey Bay- 2014
I mostly make bed and lap quilts but sometimes I'll make a wall hanging for My Guild's quilt challenge like this one.
In recent years I have been experimenting with more abstract designs...
Flannel Scraps- 2009
This was the first in a long series of Scrap Quilts.  I teach a class using a variety of techniques I call Scrap Strategies.

'30's Scraps - 104" x 104"
Leftovers from '30's Scraps 
Batik Scraps #2 
Batik Scraps # 5 
Lately I've been dabbling with some "Modern Designs".
Modern Harlequin- 2015 
Simple Modern Improv- 2015

Color swatches- 2014

Modern Village- 2015

Shutes and Ladders- 2014
If you'd like to see some of my other quilts check out the tabs at the top of this page.
I hope you enjoyed my little retrospective.  
I have certainly enjoyed visiting all of the websites in the linky party!  What an amazing collection of talented quilters!
Have a great week!
cheers, Claire W.

Wednesday, November 11, 2015

Major Purge and Give Away

If you are looking for the PVQA BOM,  I will be posting that next Monday.  Right now I have some more pressing matters...
Well I don't think I'm a pathological hoarder but I do tend to hold onto fabric and quilt supplies in general until I am Absolutely, Positively sure that I have no use for them!

But after 20 years of quilt making in my sewing room And because I'm getting a new long arm machine, Yeah!  But the frame is a foot wider than my old one,Yikes! that's 12 square feet of space in my sewing room,   I decided it was time for a major purge!!!

So what does that mean...
-Out went the polybatting that I will never use!

-Out went almost half of my old garment fabrics!

-Out went a whole bunch of random scrap bags full of project ideas that even after incubatting for
  Oh, I don't know, maybe 15 years have not passed the idea stage...

-Out went all of the large chunks of fleece leftovers.   I thought I would someday piece them together
  to make a quilt backing, Oh Ya!

Well you get the idea.  One of the great thing about our Quilt Fair is we have the most amazing Flea Market and the committee takes donations all year long and stores them!!!  Soooo before I could change my mind all that stuff went into the back of my van where I will take it to our general meeting and Poof, storage problem solved!!!

Of course I did thin my stash some,  I've got a decent pile of  fat quarter and yardage that I decided I could live without.  Next Monday I will post a picture and offer that up as a give away! Check back then to see some fun stuff and directions.
                           
                                                  Cheers, 'til then, CW


Finishes of a different kind

  I haven't made a T-shirt quilt in many years, but when my daughters childhood friend Sara asked me to make her husband's Warriors ...