Wednesday, October 14, 2015

PVQA BOM for October- "Falling Leaves"

As I mentioned to my guild meeting the other night we all have personal styles when it comes to piecing but it's important to put your best piecing practices forward when participating with BOM.  Here's a link to a post I did a while back titled "Have you checked your 1/4 inch lately?"  If you've never done this and you have trouble getting your blocks to turn out the right size try this little exercise https://www.blogger.com/blogger.g?blogID=2647971298846852786#editor/target=post;postID=4779647672329847051;onPublishedMenu=posts;onClosedMenu=posts;postNum=12;src=postname .

   For the October BOM I wanted a Fall theme block,  something a little different looking than your average Maple Leaf block and I found this really pretty deciduous leaf print and I designed this  block setting to go around it.  I think it's an original block design tho' I have not done a literature search?!  How does that work?
I'm calling the design "Falling Leaves".  I like designs that tessellate and this one does! 
I think this bolck has a lot of possibilities 'cause with a little planning you could have the corners and squares be different colors which would make it a lot more interesting.  But since I was handing out fabric for the BOM I had to keep the color scheme simple.

At first glance the block might look kind of complicated but really the design is mainly 12 Triangle Half Squares arranged in a slightly different way!

The  Packets for guild members included:  One 3” strip and one lg. patch of Leaf print (L) and strips of gold fabric (Y) in 2.5” x 10" and 3” x 12". 

You could use almost any kind of novelty fabric for the centers and coordinate whatever you want for the THS and corners.

From the Leaf Print  (L) –cut 2- 3”  squares from the strip and a 6.5” square from the lg patch. Try to fussy cut the large patch so one leaf or cluster of leaves is featured in the square.  It does not have to be perfectly centered or include the entire label, just cut it so there is one main leaf of interest if possible.

From the Gold Print  (Y) -cut 4- 2.5 “ squares from the 10” strip and 4- 3” squares from the 3” wide strip/s.

From Your Stash pick a Green Print   (G)  -cut 6- 3” squares of a medium dark to dark green fabric
NOTE: The green may range from an olive or yellow/green to a blue green, it may be a print, tone on tone, batik etc.  Avoid prints with light tones such as cream, white & pastel.

Make the Triangle Half Squares (THS)
There are lots of ways to make THS.  I like this method when making small numbers, it’s easy and precise.  For a detailed explanation with pictures of this check here

Match the 2– 3” leaf print squares, right sides together with 2 of the green
3” squares.  Press these 2 units together and cut on the diagonal.  Sew along this          
diagonal to make 4 THS.  Press toward the green fabric and trim to 2.5” square.

Match the remaining 4- 3” green squares right sides together with the
4- 3” gold squares.  Repeat the above procedure to yield 8- 2.5” THS.

Assemble the THS to make the side units- 
All 4 sides have the same orientation of THS.  I always lay them out after each round of sewing  A quick visual check to make sure I have not made any errors.  
Here's the right THS flopped over the middle one ready to sew.  When there are two seams at one end it's a good idea to start on the bump of seams and sew toward the thin end.
Another quick check to make sure all patches are where they should be. 
The side units seem to be matching up with the center pretty well.  Press and sew these units with the pieced side on the bottom.
Press toward the center.
Another quick check to make sure the size is on track.  With a block like this you can adjust the seams a bit if it is to big or to small.
Sew the 2.5" gold squares on to the 2 remaining side units, one on each end and press toward the corner squares.
Add these two units to either side of the center, the seams should nest.  Sew again with the pieced units underneath, press toward the center.
One more size check and we're good to go!
On the left are 4 blocks of my first attempt at a color scheme.  I really found that leaf fabric to busy for the block design and the cream fab to bland .  I like the second color scheme much better.  I Sew, I Learn!  Hey, that sounds like a good name for a Blog?!  lol
I hope you enjoy Falling Leaves and
I hope you all have a great Fall!
Cheers, Claire W.


Wednesday, October 7, 2015

Pink and Blue

Pink and Blue, what a great color combo, especially when illuminated by some natural inspiration!
I caught this sunset recently and the colors were so vivid!  My camera has a pretty decent zoom so I was able to get a picture that showed those beautiful colors and textures!
Here's the same view only zoomed back a bit. 
And here it is on normal landscape with a flash.  Quite a difference!
I have had a pattern in mind to make a pink and blue quilt for awhile, maybe it's time I got that pattern out and got started?!
What's your pink and blue?
Do you have a pattern that you've been wanting to make?
I'll keep you posted on my start!
cheers, CW


Saturday, September 26, 2015

Simple Modern Improv. Class sample #2

 I've been working on some ideas for more samples for my "Simple Modern Improv" class.  Here's my first sample.  Here's what I've got so far...                                                                    
Here's how I got there...
I recently treated myself to a couple of new books.  One by Sherri Lynn Wood, "Improv Handbook for Modern Quilters"  really got me thinking about solid strips in long bar formations see p. 32!
That quilt gave me the idea for this long scrappy unit.
Here's how I constructed it: 
 I picked a whole bunch of solid strips from my Solids scrap basket.
First I took all those strips and stacked them. The order of color and width were not important at this point.  I just wanted to get them tidy so I stacked them and ironed them on-mass. 
Then I cut two 10 inch (+/-) sets off one end of the stack and started to sew. By selecting alternately from each pile to make the strip sets I could keep the colors pretty random but not have leftovers or repeats.  
I needed to make a bar of strips about 65" long and 10" wide so I put the strip sets up on my wall with gaps here and there so I could add strips to balance the color and measure how many more strip sets I needed to make 65".
Once I got my stripy bar together I needed to cut some Curves.  That's a pretty long bunch of curves to cut without a guide so I folded a long piece of butcher paper accordion style and then cut free hand a gentle S curve to use as a guide.  
With a little trimming I got them the shape I wanted.
I spent about a half a day cleaning my sewing table to make room for my two sewing mats end to end.  That way I could cut my first curve in one continuous motion.  I cut the curve free hand with my rotary cutter using the edge of the butcher paper as my guide.
Then I layed the curve side on the white fabric, both right sides up and used the curve of the stripy bar as my guide to cut the white fabric. 

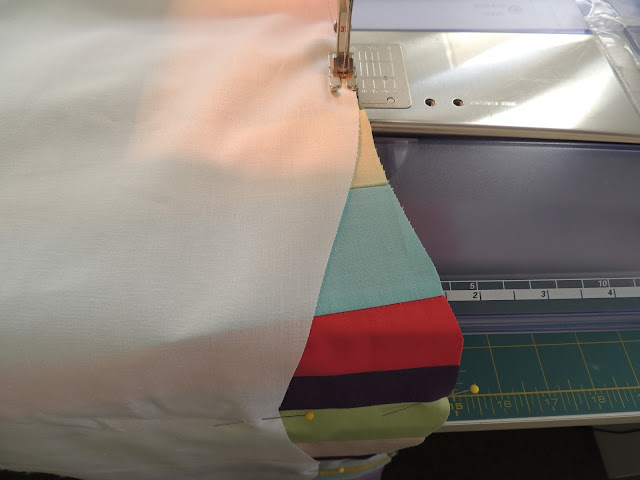
Then I flipped the white fabric right side down on the stripy bar and put pins to mark the hills and valleys of the curves. 
Curved piecing is a bit like easing in a sleeve in a garment.  You sew 1/2", adjust, sew 1/2", adjust, curse a bit, sew 1/2" etc. 
You can see I'm keeping pretty even with my pin markers! 
Here's the seam before pressing. 
And after pressing...
Now by laying the other curvy edge of  the white fabric on top of the right side of the bar you can see how the finished bar will look.  I will show you where this piece is going next time. 
 Phew!  Some piecing can be intense!  I think I'm headed for a nap!
Happy weekend!
Cheers, CW


Sunday, September 20, 2015

What to do with that bag of Flannel strips?!

Randy gave me a huge bag of flannel strips awhile back and I knew right-off what I wanted to do with them!
I need a nice heavy quilt for our bed at our cabin and with a bag of flannel strips and log cabin blocks I knew I could not go wrong!!
OK, so the blocks are a little wonky and the light "Barns" are smaller than the dark "Barns".  When you have more dark strips than lights the dark sides get an extra round of strips!  But I kind of like all those effects!
When it got this big (72" x 72") I thought it would be big enough by adding a nice wide border. But, after auditioning a bunch of border options I decided it would really look better as an edge to edge design.  So back to the scrap bag I went!  36 more blocks to go....
What's your favorite layout for Log Cabin Blocks?
I like 'um all but I kind of lean towards the Barn Raising Layout (as above).
Cheers, CW


Saturday, September 12, 2015

Another UFO- DONE!!!!

I did not have a lot of sewing time this summer but my husband asked me to make a wall hanging for a blank spot on our cabin wall and this project came to mind.
I started this wall hanging in Judy Sisneros' class,  I think it was called 'Strippy Landscapes', or something like that?  I can't remember, it was probably almost 20 years ago!  You can see the water and foreground are strips, simply stitched.  This was the technique being taught. Then I appliquéd the boat on top.  It is a fairly simple technique to get a relatively realistic result.  Below is the picture that inspired the project.
That's a photo of the Triton cove, Hood Canal, WA. where our cabin is located (at very low tide).  The wooden boat is our 4 oar row boat almost beached in the eel grass.  I think my version is a reasonable rendering?!
I don't know why it took me so long to finish.  I think it was mostly that I did not have any place in my house that I wanted to display it.  But it seemed just right for the cabin since it was so close to the spot that inspired it?!
I hope you all had a wonderful summer, sewing or not!!!
cheers, CW

Sunday, August 9, 2015

PVQA August 2015 -BOM- Scrappy 16 Patch

This month's BOM is a "Catch-up" block.  At PVQA we have a credit system for our BOM.  Basically,  if you want to put in for the drawing you have to make the block and for every block you make you get a credit.  People accumulate credits and when they win a BOM there block credits are debited the number of blocks that they won.  It may sound kind of strict but through trial and error we've found this system encourages people to participate.  This month is a scrappy use-all-your-own-fabric block.   You can make up to 6 blocks and earn up tp 6 credits if you need to catch- up on your credits or bank some credits for when you win!
I'm linking up with Scraptastic Tuesday, the linky buttonis just to the right!  cheers!
Since we'll only be making one to a handful of blocks I would start by cutting and laying out  the blocks individually as shown in the above pic.

Choosing Fabrics: 
The real trick to picking fabrics for a design like this is to get the contrast right.  The 4 patches running diagonally down the middle ( I'm calling that the spine) need to be a strong bright color.  Then the five patches to the left need to be dark with the darkest on the lower left corner and the 5 patches to the right need to be light with the lightest in the upper right corner.  Both sets need to contrast with the the 'spine' so that the spine stands out because that is what helps make the secondary pattern when you put the blocks together.  Colors are really secondary to the value here but think primary and secondary colors.  For example if you have a blue spine as above, yellow on one side and purple on the other set the bright blue off really nicely!  

Cutting;  
Follow the block design about and 
Cut all  the patches 2.5" square -16 total. 
Some people might piece this in rows but I think it is a little more accurate to sew it in 4 sets of 4 patches.  I lay the patches out in pairs as they appear in the block and sew the first round.  I put the pairs right sides together and press them.  The static Cling created helps to hold the patches together when they are sewn.
Pressing Seams:
 The first round of ironing is real important to be consistent.  If you do this the rest of the ironing pretty much falls into place And all your seams will nest and be easier to sewn.
Once again I put right sides together and press the units so they don't shift when sewn.
Now all those seams are nesting and you will be sewing against the top seam.  This tends to push the seams together and make them match-up perfectly!
If you are a new bee and wondering what 'nesting' means look at the above photo.  In the upper two patch the seam is ironed toward the green fab.  That creates a slight bump which can be pushed against the slight bump in the lower two patch.  That way all four patches will meet perfectly at that intersection!
Next round of pressing:
 Notice the intersections in the middle of each 4 patch.  I've opened the seams in the middle (pulled a few threads out at the end of each verticle seam) and pressed each horizontal seam to opposite sides.  You can see it best in the lower left 4 patch. 

This distributes the bulk of the seams more evenly and when you go to sew the next round the seams will nest again.  This time however you are sewing toward the lower seam so it's a good idea to put a pin just above those seams to anchor them to each other.  See the pins on the right side of the photo.
Press again before sewing.


Open the last set of seams and you can see how tidy the whole block looks on the back side?!
And the size is pretty accurate,  8.5" unfinished!
The cool thing about a block like this is just how many ways you can arrange them to make a top!  Here are a few of the possibilities!
It's just as versitile as a log cabin block!
I hope you have fun with this Block!
Happy August!
Cheers, Claire W.


Saturday, August 1, 2015

Simple Modern Improv- Class Sample #1

I've been playing with Modern designs for a while now (see here and here and here ).  I really like abstract designs and I like figuring out ways to construct such designs.  So I decided to design some samples for a class based around these design ideas and techniques.
I think of these kind of designs like a cloth Ikebana arrangement.  Just seven or so elements arranged in an interesting geometry makes a great minimalist design!
I played around with placement ( the fun part!)...


And eventually settled on this placement.  All the pieces were sewn by machine even the in-set squares. I will post about how I did that another time.  
I think of designs like this kind of like a visual Haiku.  A few short phrases or elements that when juxtaposed create and interesting  composition?!
The're fun to compose and fairly easy to construct!
cheers, CW

Finishes of a different kind

  I haven't made a T-shirt quilt in many years, but when my daughters childhood friend Sara asked me to make her husband's Warriors ...